Silver Efex Pro Film Types

I have been playing with Nik Software's Silver Effects Pro plug in for Photoshop and Lightroom over the past few weeks. One of the features of the plug in is a "grain engine" which "accurately recreates your digital photographs to look like a traditional black and white image...mimicking the traditional silver halide process." This post is not a review of the grain engine. Also, I have not used all of these film emulsions so I cannot say if they are accurate or not but I wanted to show a few samples generated by the software.

Apart from the adding the grain, no other tweaking was done either in Lightroom or Silver Efex Pro.

The original photo was taken using Kodak Ektar 100 which is a pretty fine grain film. What follows is a "neutral" B&W conversion with no grain added and then five samples which mimic Kodak ISO 32 Panatomic-X, Agfa APX 100, Ilford FP4, Kodak Tri-X 400, Fuji Neopan 1600 and Kodak TMax 3200. (There are twelve other film types that I am not showing here).

Let me know what you think.

Testing Nik Software's Silver Efex Pro

For my digital photography, I downloaded a demo version of Nik Software's Silver Efex Pro which is a plug in for Photoshop, Lightroom or Aperture that can be used to create black and white photos. Not sure if I will buy the full version (it costs $200) but it is very easy to use and gives pretty good results right out of the box.

Mamiya M645 1000s

Mamiya M645 1000S This is my Christmas present to myself. It's a Mamiya M645 1000s medium format camera. It is shown here with a 80mm Mamiya-Sekor C lens and I also got 55mm and 150mm lenses.

The 645 series was introduced in 1975 with the 1000s coming in 1976. I believe they continued to make the 1000s until 1990.

The camera is an SLR with an image format of 6cm x 4.5cm. You get 15 frames on a 120 roll and 30 frames on a 220 roll. The film is put into inserts which then go into the camera. 120 and 220 films use different inserts presumably because of the need for different pressure plates due to the lack of paper in 220 film. Later models used magazines which could be swapped mid roll.

Here are a few test shots from the first roll.

New (Old) Beseler Enlarger

Over the weekend, my wife's Uncle Dave gave me his old Beseler enlarger. It has been about 20 years since I last made a print in the darkroom so I am looking forward to trying this again. Beseler Enlarger

So far I don't know much about the enlarger. The only distinguishing mark is "Universal Colorhead" written on the front. From what I can tell by searching the web, the model is actually a 23C Series II although I haven't been able to confirm that yet.

Beseler Enlarger

The enlarger came with a 50mm Nikon Nikkor lens which will work for 35mm negatives. The enlarger can also be used for 6x6 and 6x9 negatives but I will need a 75mm or 80mm lens to print from those negatives.

I did find a manual for a 23C II - XL on APUG and it looks like it will work with my enlarger.

Beseler Enlarger

Beseler Enlarger

Beseler Enlarger

Fade to What The ?

Got an email today from Polapremium advertising a new film which among other things states

Everyone at the Polapremium headquarters is excited!...We did not want to release this treasure before we knew exactly what it does, how it reacts and what can be done with it. So we have tested it for a long time now and are finally ready to launch this jewel. Curious?

Sounds good yes? I don't know about you but I am exited. Tell me more while I look for my credit card.

Strikingly special about this unique film is that shortly after taking the photo the picture drifts through different phases of light bluish greens through darker brownish reds, slowly collecting more and more unusual textures and streaks before it turns to blackness.

light bluish greens...yum....darker brownish reds......OK... My credit card number is......wait...it turns to WHAT????

before it turns to blackness.

Hmmm...must have read that wrong. Let's continue.

It is almost as if TIME tears at the picture's existence in FAST FORWARD.

Within 12 hrs the film reaches an incredibly beautiful darkness. Within 24 hrs the picture turns to BLACK.

The precious moment of time becomes a VISUAL SECRET.

Visual secrets, beautiful darkness, turns to black......whaooo!!!! Turns to black?

OK. If I am reading this correctly, the film will go black and you will have no photograph within 24 hours. Are Polapremium taking the piss????? I am pretty sure something that turns to black 24 hours after you expose it to light is not the definition of a "jewel".

But...

Reading on further, PP go on to list some techniques on how to make the photo permanent and this is where it starts to sound pretty interesting. First of all, there are a couple of  methods where you can peel off the positive from the negative which looks like it will stop the development process.

There is also a "solar" technique where you let the photo sit in the sun for a few weeks and an image will reappear.

And I have to admit, from the photos in the email, the results from the peel apart and the solar techniques look excellent.

Fade To Black

But sill, this is obviously sub standard film that was either unfinished when the Polaroid plant closed or fished out of the trash can at the back of the factory. Or maybe, this film is from a not so successful experiment by the Impossible Project.

Either way, I think it is funny to read the email with all the marketing speak (Someone just got their diploma from the Lomographic Institute of Marketing). But if you feel like experimenting (and I will admit I am tempted myself), check out the link below.

Link: http://www.polapremium.com/shop/film/sx70/fi_sx70_1_1009_fade
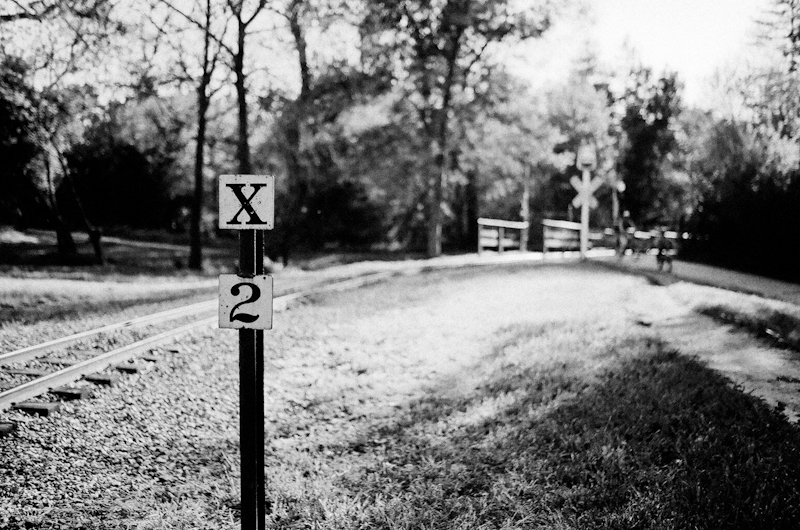
Holgapalooza Winners Announced

Got an email today from Holgapalooza announcing the winners of the competition. Congratulations to all the winners.

We will have to wait until the winter issue of Lightleaks Magazine to see the winning photographs.

Category: HOLGASCAPES Judge: Sandra Carrion 1st: Gayle Stevens 2nd: Phil Bebbington 3rd: Ray Carns Honourable Mention: Maggie Willis

Category: PORTRAIT/SELF-PORTRAIT Judge: Gordon Stettinius 1st: Christiane Ingenthron 2nd:Warren Harold 3rd: James Arnold Honorable Mention: Stéphane Heinz

Category: INSPIRATION Judge: Annu Palakunnathu Matthew 1st: Sarah Hodzic 2nd: Zeb Andrews 3rd: Alain Gauvin Honourable Mention: Lori Andrews

Category: ALTERED REALITY Judge: Michelle Bates 1st: Laura Burlton 2nd: Chris Durnin 3rd: Jeff Evans Honourable Mention: Chris Hanke

Category: Holgaroids Judge: Steph Parke 1st: Ray Yen 2nd: Penny Nannini 3rd: Nicole Gesmondi Honourable Mention: Isabelle Field

Voigtlander Vito II

Large-1 I picked up this Voigtlander Vito II today at the San Jose photo fair. This particular Vito II is a later generation with Prontar SVS shutter and was introduced around 1954. The lens is a Color-Skopar f/3.5 50mm.

The camera is fully manual with shutter speeds from 1/300 to 1 sec in addition to bulb. There is a cable release socket for long exposures. Focusing is achieved by rotating the lens that has distances marked on it in feet. The lens also has symbols to represent "near" (8 to 15 feet) and "far" (15 feet to infinity) which work as zone focusing with using an aperture of f/5.6 or smaller.

The camera has an interesting feature whereby you can manually set the frame counter to any number you wish. This means you can shoot half a roll, wind it back to load a different roll and when you want to reload the first roll, you set the frame counter back to the way it was.

This camera appears to work. Shutter speeds change depending on the setting. I just shot a test roll so I will see if the bellows or any of the seals leak once I get that developed.

Vivian Maier Street Photography

Came across an interesting discussion on Flickr recently started by John Maloof.

I purchased a giant lot of negatives from a small auction house here in Chicago. It is the work of Vivian Maier, a French born photographer who recently past away in April of 2009 in Chicago, where she resided... have a ton of her work (about 30-40,000 negatives) which ranges in dates from the 1950's-1970's.

John has started posting these photographs to a blog http://vivianmaier.blogspot.com/ and is looking to exhibit the work.

Vivian Maier

It is well worth the time to go through what has been posted so far and I look forward to seeing more.

Links: Flickr discussion & John Maloof's profile.

Holgas Tips For The Uninitiated

You've just received your new Holga 120 camera in the mail and you are itching to go shoot some film in it for the first time. But you've read that most people are disappointed with their first roll. Why is that? holga

First of all, this phenomenon is probably not just related to the Holga. For many of us when we get a new toy, we want to test out that toy as fast as we can. We want to see what that toy does and how it performs. So it is normal to shoot a roll through any new camera as fast as possible without any real regard for the subject matter.

But the Holga plastic camera does have it's own challenges especially when this is a photographer's first film camera. So here are a few tips that may help you. Feel free to add your own tips in the comments if you have more.

  • Slow down and think about what you are shooting. That way you will get a higher hit rate of keepers compared to if you just shoot at anything and "don't think".
  • You won't need the lens cap so throw it away. Otherwise you will invariably waste at least one frame with it on.
  • Some 120 films use a "|" instead of a "1" for the first frame so watch out for it when you are loading film.
  • Don't cross process your first roll. Get to know how your camera takes photos before adding other variables into the mix.
  • 400 ISO film is probably OK for general purpose shooting (It's what I use even in full California sun).
  • For your first roll, the brand doesn't matter. Just use what you can find.
  • Know how to set up the frame counter window. For 12 6x6 shots, the arrow points to the number (not the window).
  • Squarefrog is your friend http://www.squarefrog.co.uk/
  • Tape the B/N switch in the N position (slide the switch over to the N side) unless you want to take long exposures.
  • Unless you are taking double exposures get into the habit of winding on to the next frame after you take a shot. If you are consistent then you won't be wondering if you need to wind on or not.
  • Don't forget to focus.
  • Find some way to keep the back on. I use tape. Other people use modified clips, Velcro or rubber bands.
  • The viewfinder and the lens don't line up. That's not a big deal for subjects in the distance but for closer subjects take this into  account.
  • Oh yeah..look through the viewfinder. Shooting from the hip doesn't always give you interesting images.
  • The sunny/cloudy switch doesn't do anything (although I have  read reports that the aperture switch may actual work in newer Holgas).
  • If you get unintentional overlapping frames, then your frame counter switch is in the wrong setting.
  • Enjoy yourself - this is supposed to be fun after all...