Developing Film Part 3 – Processing Details

This post is the last part in a 3 part series I am doing on developing film at home. Before reading this post, I recommend you first read the first two parts if you have not done so already.

Developing Film Part 1 – Loading The Tank

Developing Film Part 2 – Process Overview and Equipment

Process Overview

1. Preparation

2. Development

3. Wash

4. Dry

Other photographers may follow a slightly different process and with time you will develop a method that suits you.

One thing to note is that all of this is done in my kitchen in daylight. There is a misconception that you need a darkroom to develop film. Any place with running water will suffice.

Step 1 - Preparation

The first thing to get is to get all of your equipment and chemicals ready to use.

developing_film_at_home-1

a) Mix any chemicals that need to be mixed or diluted. Since I use Kodak HC-110developer, I will first mix the concentrate with water in one of my graduated cylinders. For 35mm film I use 300ml of developer so for "dilution B", this means I mix 9ml of concentrate with 291ml of water.

I also lay out cylinders with stop bath and fixer. These chemicals are stored in pre-mixed form so no further preparation is required.

An important thing to note is that you will need to ensure the temperature of the chemicals and water are close to the recommended temperature. In most cases this is 20 degree C (68 degree F). With black and white film development the tolerances allow for you to be off a few degrees but it is good practice to aim for the right temperature.

developing_film_at_home-2

In the winter, "room temperature" in my house is around 20 degrees C so there isn't anything special I need to do to maintain the correct temperature. However, during the summer the house is a bit warmer so I will put each of the cylinders in a water bath to keep them around 20 degrees.

b) Prepare the timer you will use to time each of the steps. I use the iPhone app Massive Dev Chart App but any clock will do.

developing_film_at_home-3

Make sure you know the development, stop and fix times for the chemicals you are using. Stop and fix times will normally be written on the packaging and if you are not using an automated timer like the Massive Dev Chart app, you can find the developing times for your film/developer combination on the Massive Dev Chart website.

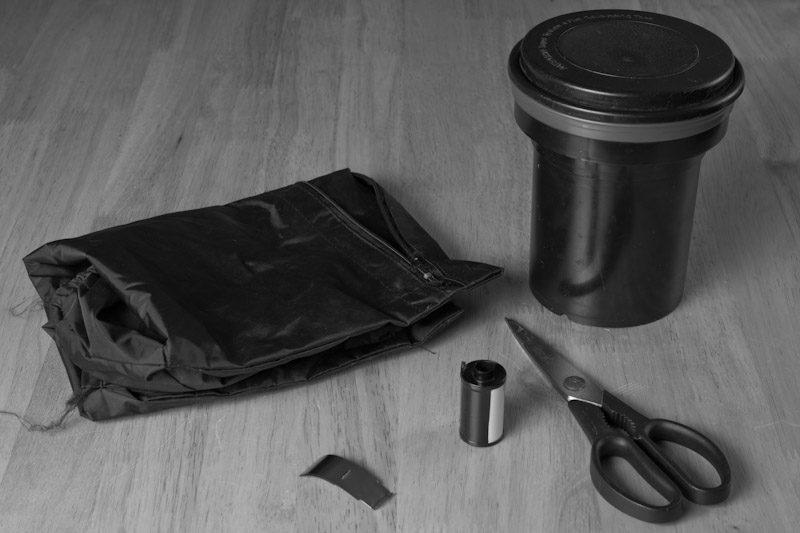
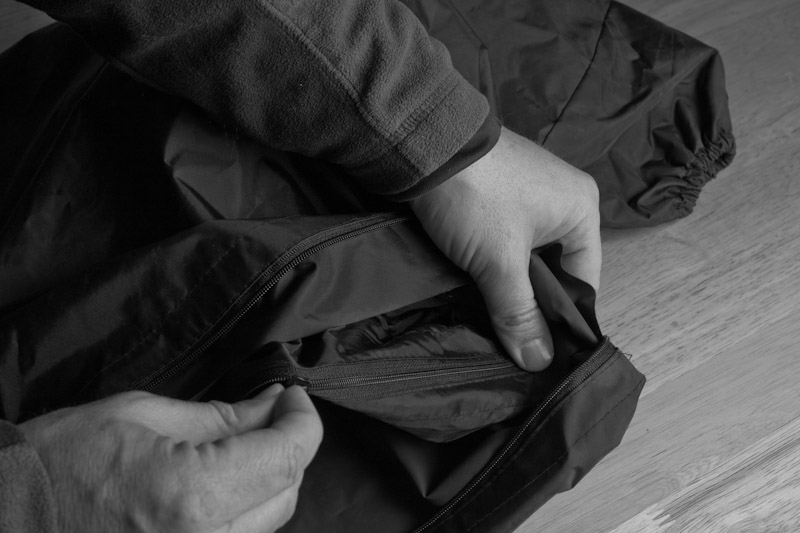
c) Of course you also need your developing tank with the unprocessed film already loaded.

Step 2 - Development

Once everything is in place, you are ready to start developing.

a) Pour the developer into the developing tank and start your timer. Put the top lid back on the tank.

b)Gentlyagitate the tank for 1 minute.

The reason for agitation is to ensure fresh developer is in contact with the film during the process. There are many different agitation techniques. One is to use a rod to rotate the reel in the tank but more common method is to invert the tank and bring it back right side up.

A key thing is to do this gently. You don't want to over-agitate the chemicals. I normally invert the tank and return it upright once every 5 seconds. Some people do it at twice this rate.

Note: here I agitate continuously for the first minute. Some people just agitate for a few seconds initially.

c) At the end of the first minute, gently tap the tank on the counter to dislodge any air bubbles from the sides of the film. Set the tank down on the counter.

d) Every minute after the first, agitate gently for around 10 seconds and tap the tank to remove the bubbles. Repeat this every minute until the end of the developing time.

e) A few seconds before the end of the developing time, pour out the developer.

f) Pour in the stop bath, put on the lid and agitate for about 30 to 45 seconds. Pour out the stop bath.

Note: the actual stop time will depend on the stop bath chemicals you are using.

g) Pour in the fixer and agitate for 1 minute.

h) At the end of the first minute, gently tap the tank on the counter to dislodge the bubbles and set the tank down on the counter.

i) Every minute after the first, agitate by inverting the tank four times.

j) Repeat this agitation every minute until the end of the fixing time. Pour out the fixer.

The actual fixing time will depend on the fixer being used. I use Ilford Rapid Fixer. When fresh, the film is normally fixed in about 3 minutes but I normally fix for 5 minutes.

Note: Whether you discard or keep and reuse the chemicals depends on the chemical being used. Read the information that came with the chemicals.

Step 3 - Wash

The film is now developed and fixed and can be exposed to daylight.

developing_film_at_home-5

The next step is to wash the film to remove any remnants of the fixer and other chemicals. There are two main methods for washing film. The first is to run fresh water into the tank (at 20 deg C) for 5 to 10 minutes. The second method, sometimes called "The Ilford Method" is the one I use and is described here.

developing_film_at_home-4

a) Fill the tank with 20 deg C water and with the lid on, invert the tank 5 times.

b) Empty the tank, fill with fresh water and invert 10 times.

c) Empty the tank, fill with fresh water and invert 20 times.

d) Add wetting agent like Kodak Photo Flo to the tank and allow to sit for 30 seconds. Drain the tank.

Step 4 - Dry

Lastly, you will need to dry the film. The key thing about this step is that dust is now your enemy. I usually dry my film in the bathroom. To reduce dust (expecially in the summer), I run the shower for about a minute before hanging the film.

developing_film_at_home-8

a) Remove the film from the reel.

b) Using a film clip (or clothes pin) hang the film somewhere dry and dust free.

c) You may want to squeegee the film the remove excess water. I use my fingers but you can use special film squeegee.

d) Once the film is dry, cut it into strips and put into a negative holder to keep the film dust free.

How long the film takes to dry depends on the environment but you can periodically check the film by touching the bottom of the film (nearest the ground since this will dry last) where there are no images. If it is sticky or damp, wait a little longer.

If you are in a hurry you can use a hair dryer on the lowest setting but I don't recommend that. I know the anticipation can be really strong but relax and wait. Rushing the drying may result in damaged or dusty negatives. Putting damp negatives into a negative holder is a recipe for disaster.

Conclusion

The process presented here is how I develop my film. Other people may use different techniques. If you have any questions or better methods add them in the comments.

Developing Film Part 2 – Process Overview and Equipment

This post is part 2 in my Developing Film series. You can read part 1 here where I go through putting your exposed film into a developing tank. In this post, I will give an overview of the process of developing film and will briefly go through the chemicals and equipment required. The next post in the series will then show the process in action. Also, this post is for black and white film processing. Color processing is slightly different and is something I do not have any experience with.

Processing Overview

To process the film these are the steps I follow:-

1. Development

2. Stop bath

3.  Fix

4. Wash

5. Wetting agent

6. Dry

Development - In this step, the latent image on the negative is converted to a visible image. The chemical used in this step is called a Developer. There are many different kinds of developer from many different manufacturers. The amount of time the film is processed in this step depends on the type of developer and film being used. Instructions come with each developer listing recommended development times for various common films but a greater resource exists in the Massive Dev Chart online. Here you will find nearly all film/developer combinations.

During development, the developer needs to be agitated periodically so that fresh chemicals are adjacent to the film. This is usually done by inverting the tank a few times every 30 seconds or every 1 minute.

Stop Bath - To prevent continuing development, a Stop Bath is used. This is usually a very diluted solution of acetic acid or citric acid. Some people use water instead of chemicals in this step.

Fix - Up to this point, the film is still light sensitive so a Fixer is used to make the image permanent. After this step is complete, the developing tank can be opened and the film can now be exposed to light.

Wash - During this step, the film is washed to remove any traces of chemicals which can harm the archival properties of the film. Washing can be achieved by using running water for 5 to 10 minutes or by using the "Ilford Method" which uses less water. In this method, the tank is filled with water and inverted 5 times. Fresh water is then used and the process repeated for 10 inversions and 20 inversions.

Wetting Agent - This is an optional step. Here a very small amount of surfactant is added to water. This helps the film shed water faster and helps speed up drying. I also helps reduce the formation of water marks than can occur during drying.

Dry - The film is obviously still wet so needs to be dried before it can be printed or scanned. The film is removed from the developing reel and hung up to dry. Dust is your enemy now so the place being used must be relatively dust free. Once the drying is complete, the negatives can be cut into strips and stored in a plastic negative sleeve.

Chemicals I Currently Use

There are many different chemical manufacturers and each manufacturer may have different chemical product lines with different properties. What you use is a personal preference but this is a list of what I am using these days.

Developer - At the moment I am using Kodak HC-110. In the US, this developer comes in a highly concentrated form which must be diluted before use. It is best to dilute right before processing since it last longer when stored in its concentrate form. This is a "one shot" developer so is discarded after use.

Stop Bath - For the stop bath I am using Kodak Indicator Stop Bath. This stop bath can be reused many times. It will change color when it is exhausted but as far as I can tell it lasts for a very long time without needing to be replaced.

Fixer - Right now I am using Ilford Rapid Fixer. This can be reused multiple times. When fresh, this fixer can fix film in about 2 minutes but as it gets depleted it can take about 5 minutes to adequately fix the film. Every so often I test how good the fixer is by putting a snipped off film leader into some of the fixer. I time how long it takes for the film to become clear and will then use twice that time for my fix.

Wetting Agent - I use Kodak Photo Flo. The amounts of this stuff you use is so minute that I think the bottle I have will outlast me.

Equipment

In addition to the chemicals, some equipment is needed.

Thermometer - Most developing times are listed for 20 deg C (68 deg F) so the temperature of the chemicals is important. With black and white there is some leeway but it is best to have the developer at the recommended temperature.

Graduated Cylinders - You will need a few of these. I use a 50 ml one for measuring out small amounts of chemicals (like the developer) and I have a few more ranging from 300 ml to 1200 ml for the other chemicals. I use my cylinders to hold the chemicals while I am processing but some people use dedicated beakers for this.

Stirring Rod - To mix the chemicals you will need something to stir with. I actually use my thermometer for this because mine is a dial type thermometer with a long metal rod that is inserted in the liquid.  If you are using a glass thermometer it is probably not recommended to stir with it.

Stopwatch - You need some way to time each of the steps so a stopwatch or clock is required. I actually use the Massive Dev Chart iPhone app which contains the film/developer database and has a built in timer. You can read my review of that application here.

Film Clip - These are small metal clips that are used to hang up the film to dry. When I started developing many years ago I used clothes pins to hang up the film.

Storage Bottles - Some chemicals are "one shots" so will be mixed before use and discarded after. However, some can be reused many times so you will need some containers to store them. The containers should be opaque and be rated for chemical storage to avoid spoiling or leaking. It is best to use bottles specifically designed for photographic chemicals.

Negative Sleeves - These sleeves store the negatives with cut into strips of 6.

Where to Buy

It is getting more difficult to find chemicals at local photography stores but some still carry some limited supplies. My local store only carries a few brands and not the ones I use so I buy my chemicals at Freestyle Photographic Supplies.

Because many people have switched to digital, it is possible to buy the equipment needed on eBay or Craigslist for real cheap so it is worth doing a some searches online. But if there is nothing suitable Fresstyle also carries a huge selection of supplies.

The Details

In the next post, I will go through the development process that I follow in detail.

References

http://en.wikipedia.org/wiki/Photographic_processing

http://www.ilfordphoto.com/applications/page.asp?n=9

Developing Film Part 1 - Loading The Tank

This post is the first in a series where I will talk about developing film at home. In today's post I will show how I get the film into the light proof developing tank. Future posts will talk about the actual processing. I developed my first roll of black and white film over 20 years ago and my process hasn't changed much since then. I should point out that this is how I do it. Different people will have different methods but the one presented here works for me.

The Equipment

Loading Film Into A Developing Tank 1

This is what I use:-

1 dark changing bag

1 developing tank

1 film retriever

1 scissors

A few things to note here: First of all, my method uses a film retriever. A lot of people don't use this and I will talk about the alternative later. Secondly, all of this is laid out on my kitchen table in daylight. In other words, none of this is being done in a dark room or light proof closet.

Let's take a closer look at the developing tank, shown here taken apart.

Loading Film Into A Developing Tank 2

At the front is the reel. This reel is a plastic "auto-load" reel. It is called an "auto-load" because film is held on the reel by two small ball bearings and it "walks" automatically onto the reel as the sides are ratcheted back and forth.

At the back is the tank itself and to the right is the top of the tank. To the left is a cylindrical tube which will be inserted into the middle of the reel. When the reel and tube are placed into the tank, the funnel part of the top fits into this tube providing a method of introducing chemicals into the tank while maintaining a light tight environment.

On the left is the tank lid which stops the chemicals from spilling when you invert the tank. I'll talk about using chemicals for the actual processing in a later blog post.

Some people use stainless steel reels and tanks but I have never used such equipment so I cannot comment on them.

Loading the Film Onto The Reel

As I said earlier, I use a film retriever as part of my method so the first thing I do is use the retriever to pull out the film leader from the 35mm cannister. The reason why I do this is that I like to start my film on the reel in daylight so I can see what is going on.

Alternative Method -  As I stated earlier, not everyone uses this method. The more traditional way is to start the film onto the reel in the dark.

Loading Film Into A Developing Tank 3

There are different types of retrievers so I won't go into details on how to use them here but you should follow the instructions that came with your retriever.

Loading Film Into A Developing Tank 4

To make it easier to load the film onto the reel, cut off the narrow part of the leader.

Loading Film Into A Developing Tank 5

I also cut two slight diagonals into the film at the end to make it even easier to load. Once that is done you are ready to start the film onto the plastic reel.

Loading Film Into A Developing Tank 6

Warning: At this point we are only starting the film onto the reel. Do not allow more than a few inches of film to come out of the cannister or you will fog the first shot or two.

Loading Film Into A Developing Tank 7

Insert the film into the spiral on the reel and make sure it catches in the ball bearings that are on either side of the reel.

Alternative Method - If you are not starting the film in daylight, you will need to do all of the above in the dark changing bag. In that case you will extract the film from the cannister by first opening the cannister. A bottle opener can be used for that. You will then trim the end of the film leader in the dark bag using a scissors and then start the film on the reel as I have shown above.

Once that is done you can put the reel with the film attached into the changing bag.

Loading Film Into A Developing Tank 8

Next you will put the rest of the equipment you need into the changing bag. That means you need to put in the tank and the rest of its parts. So there is less clutter I assemble the tank first.

Loading Film Into A Developing Tank 9

You can also put a scissors into the tank if you plan to cut the film off the 35mm spool later.

Next zip up the bag.

Loading Film Into A Developing Tank 10

Most bags are double lined so there will be at least two zips. The inside of the bag is now lightproof.

Stick your arms into the "sleeves" of the bag and you are now ready to load the film onto the reel.

Loading Film Into A Developing Tank 11

Working In The Dark

Warning: The next few steps take place inside the bag in complete darkness. Obviously, that wouldn't make for interesting photographs so for the next few photos I am using a black background to signify that this is inside the bag.

First of all, I pull some of the film out of the cannister. I don't pull it all out since inside the bag it is tidier if remains in the cannister until it goes on the reel.

Loading Film Into A Developing Tank 12

To load the "Auto-load" reel, you ratchet one side back and forth and the film will automatically wind onto the reel. I recommend going slow at first to make sure it is loading properly. Remember all of this is now in the dark so you are going by touch.

Loading Film Into A Developing Tank 13

Pull out more film from the cannister and load onto the reel and continue until all of the film is out of the cannister. At this point you will need to disconnect the film from the 35mm spool. You can either use a scissors (assuming you have one in the bag) or you can just pull the film off the spool with a little force. I usually do the latter.

After the film is detached from the spool, ratchet a little more to get the end of the film onto the reel.

Loading Film Into A Developing Tank 14

Now you need to thread the center tube into the center of the reel. It doesn't matter which way up the reel is but make sure to push the tube all the way until it stops.

Loading Film Into A Developing Tank 15

Now put the reel and tube into the tank. You must make sure that the reel is at the bottom of the tank so that when you later pour in chemicals, it is completely immersed.

Loading Film Into A Developing Tank 16

Screw on the top of the tank. It should make a click when it is on all the way.

Loading Film Into A Developing Tank 17

You can now remove the tank from the bag and bring it into daylight for processing.

Loading Film Into A Developing Tank 18

If you are not going to process right away I'd recommend putting the lid on the tank since it is possible some light may get in over time.

And that's how I load a roll of film onto a reel. In this example, I used a 35mm roll but the process is similar with 120 medium format. The only difference is that you can't pre-load 120 film in daylight so everything is done inside the bag. But with a little practice it will become second nature.

Tips For Beginners.

Sacrifice a roll of film and practice everything in daylight until it is all second nature. You can reuse your sacrificial roll over and over until you get the loading down.

If things appear to be going wrong in the bag it is easy to start getting stressed and frustrated. If this happens, gather up the film in the bag and put it into the tank with the top on. Don't forget to also insert the center tube to keep everything light tight. Then take a break for a few minutes. When you come back to it, everything may just fit into place.

You may find it easier to load a 120 roll in a lightproof closet compared to a changing bag. My changing bag works for 120 but it is a little small.

Make sure you know how your equipment works. You may have a different tank than me so read the instructions before starting. Once again if you practice with it, everything will be easy once you start to load film blind.

I may have left something out so please let me know in the comments if something is not clear.

In part 2 I will talk about the chemicals we will use to develop black and white film.

Film Basics (A True Beginners Guide to Film Photography)

Some random bits of information for people new to film or toy camera photography based on questions seen in various Flickr groups as well as other thoughts that float into my mind as I write this.

  • You cannot get the photographs onto your computer without developing the film first. Only then can you print & scan the photograph or scan the negative/slide directly.
  • There is  no "best" film to use in "camera x". Like ice cream flavors, everyone has their own personal favorites. Try what you can get your hands on and see what you like.
  • That medium format film is not called "120mm". It is called "120". There used to also be 119 and 121 and a host of other formats. Also there is no "135mm". 35mm film is designated "135".
  • You can get the "lomo look" with it's "saturated wild colors" in a Canon, Nikon or any film camera. Just cross process the slide film as a negative.
  • But for your first roll, process it normally so you can see how your camera performs.
  • Visit your local library and find a book that explains exposure, f-stops & shutter speeds. In the long term it will be worth it to know what you are doing.
  • Processing black and white film is pretty easy and you don't even need a dark room.
  • Printing (using chemicals) does need a dark room however. But you can always scan your negatives directly on a scanner and print digitally.
  • It is OK to "post process" your photos. What do you think those people who spent hours in the dark room in ye olden times were doing?
  • Unlike a digital camera, it is normally not a good idea to change the "iso" from shot to shot on a single roll.
  • You have a limited number of images per roll - it is worth slowing down and thinking about you are doing. Don't buy into the don't think mentality or you will probably be disappointed.
  • A basic Holga plastic camera shouldn't cost more than $30.
  • Don't buy every new film camera that comes along. You won't use them all. Stick with one decent manual or semi-manual camera for now and learn how to use it well.
  • You are allowed to also use a digital camera if you want. Don't listen to anyone who says you have to pick a side.
  • If your camera doesn't have a light meter built in it might be a good idea to invest in a hand held one. (Or google "Sunny 16 rule")
  • LOMO don't make Holga's, Diana's, or Action Sampler cameras. You are confusing them with The Lomographic Society. LOMO used to make the LC-A, the Smena range and Lubitel range of cameras but are out of the camera business now. (update: I should mention that LSI do not make the Holga - this camera is made by Tokina Company Limited which is part of the Universal Electronics Groups of Hong Kong.)
  • Using the same camera as someone else it not going to automatically allow you replicate the images they have. There is a lot more variables involved including light, film type, processing, post processing, exposure and of course the person standing behind the camera.

Feel free to add your own thoughts in the comments.

International Film Buying Day

Over on Flickr right now, there is a new group promoting "International Film Buying Day" which states

I ask all who enjoy shooting on film to go out on the same day, October 1, and buy a roll (or rolls or sheets for that matter!) of film. I'm sure the sudden spike in film sales would be noticed and the industry will realise there is still quite a considerable sized market for film.

I appreciate the motives for such an endeavor but I wonder how effective this will be.

No business that wants to survive is going to heed any "spike in film sales" that occurs on one single day. I don't see suppliers investing in new capital equipment or raw materials or retailers increasing their stock orders and revising their sales projections based solely on the results of 1 day.

And this assumes that a spike will even be detected. Film suppliers typically do not sell directly to the public so any "spike" will be filtered out by the staggered resupply dates of the retailers.

What is needed is a positive trend of film sales over time which requires us to buy (and shoot) film continuously, not save up all our buying for a single day, once a year. I am sure the businesses would appreciate a more predictable customer base.

Every day should be International Film Buying Day so go now and buy some film and shoot some film.

Link: http://www.flickr.com/groups/internationalfilmbuyingday/

Update 10/1/09 : Turns out I did buy film today. I bought some in anticipation of Toy Camera Day coming up in less than two weeks and actually forgot that Oct 1st was International Film Buying Day until I saw this post was read in my blog stats.

Kodak Announces The End Of Kodachrome

kodachrome1 After 74 years as an iconic film, Kodak today announced that it will cease production Kodachrome slide film. The film has been used to create a lot of famous photographs over the years and Kodak have posted a slide show online showing some of these.

As a tribute to the film, Steve McCurry, who shot the famous National Geographic photo of a young Afghan girl, will shoot one of the last rolls of Kodachrome and donate the images to the George Eastman House International Museum of Photography and Film.

Links: Kodak News Release & a Tribute.

The Nouveau Analogue Purist

Do you edit your images or do you leave them as pure as they came out the camera?
Questions like this appear on film discussions group on Internet photography sites like Flickr from time to time and there is always a subset of people who respond with statements like "I don't edit my images , I like them to be natural" or "I don't edit. Its film, doesn't quite seem right."

In my opinion such "nouveau analogue purists" are naive and misguided. I don't know if such people are recent converts from digital or have never been in a dark room but it is very apparent they don't realize what goes into turning a negative into a photograph.

With negative film, if you don't edit your negative, then all you have is a negative. When scanned, then there is a good chance that these photographers are posting images online that have already been edited in the scanner software/firmware. This is especially likely when the scanning is done at a commercial processing lab. Of course, it is possible to turn off all auto correction (or ask the lab for no correction) but not doing any processing is selling yourself short. You are  not realizing the full potential of the negative.

When I talk about editing here, I am talking about dodge/burn/contrast - the same things you would control by time, enlarger aperture and selective exposure in a dark room.

Some examples:-

Exposure/Contrast
Darkroom Way: make exposure based on time and adjust contrast via paper choice or filters in the enlarger.
Photoshop Way: Adjust exposure and contrast via the Levels control.

Dodge/Burn
Darkroom Way: use hands, arms, bits of corn flakes boxes to hide or expose areas of the print during printing.
Photoshop Way: use a 50% grey fill layer, overlay mode and the brush to dodge or burn as required.

Yes the tools have changed, but the process is similar and the resulting image is better than doing nothing to the negative.

Now, it is everybody's prerogative to post what they like. But the negative contains a lot of information. It is shame to see so many flat and dull photographs on the Internet that could have easily been made into something decent if only those nouveau analogue purists knew a little more about the process of making a photograph.

The View From California Highway 88

The View From California Highway 88 Today I took a few photographs using a Poladoid Automatic 230 and 672 film. I've never used this film before but I am pretty impressed with the results. 672 is a peel apart type film with a film speed of 400 ISO. Since the Automatic 230 doesn't have an option for 400 I set the speed dial to 300 and then darkened it half a stop.

The exposures had a little more complexity as it was about 90 degrees F out when I was shooting so this affects the developement. According to the box, when it's 85 degress out you have to under expose by 1/3 stop. I wasn't that precise but I am happy with the results.