This post is the first in a series where I will talk about developing film at home. In today's post I will show how I get the film into the light proof developing tank. Future posts will talk about the actual processing. I developed my first roll of black and white film over 20 years ago and my process hasn't changed much since then. I should point out that this is how I do it. Different people will have different methods but the one presented here works for me.
The Equipment
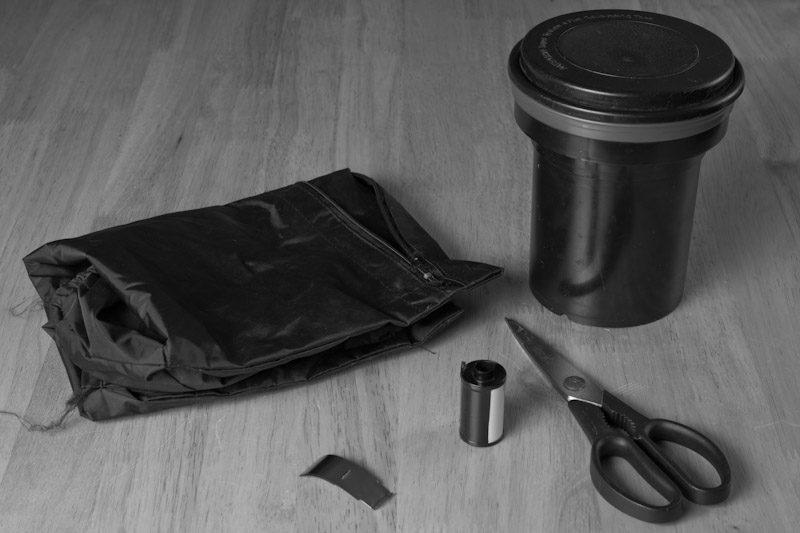
This is what I use:-
1 dark changing bag
1 developing tank
1 film retriever
1 scissors
A few things to note here: First of all, my method uses a film retriever. A lot of people don't use this and I will talk about the alternative later. Secondly, all of this is laid out on my kitchen table in daylight. In other words, none of this is being done in a dark room or light proof closet.
Let's take a closer look at the developing tank, shown here taken apart.
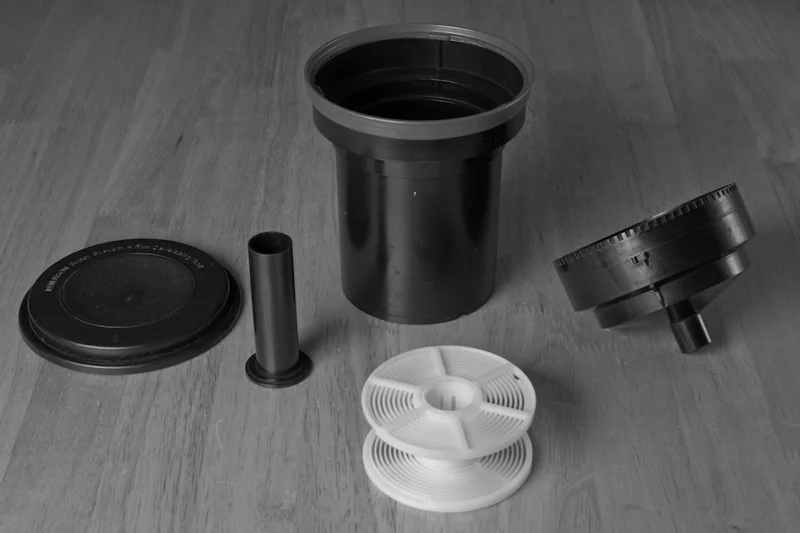
At the front is the reel. This reel is a plastic "auto-load" reel. It is called an "auto-load" because film is held on the reel by two small ball bearings and it "walks" automatically onto the reel as the sides are ratcheted back and forth.
At the back is the tank itself and to the right is the top of the tank. To the left is a cylindrical tube which will be inserted into the middle of the reel. When the reel and tube are placed into the tank, the funnel part of the top fits into this tube providing a method of introducing chemicals into the tank while maintaining a light tight environment.
On the left is the tank lid which stops the chemicals from spilling when you invert the tank. I'll talk about using chemicals for the actual processing in a later blog post.
Some people use stainless steel reels and tanks but I have never used such equipment so I cannot comment on them.
Loading the Film Onto The Reel
As I said earlier, I use a film retriever as part of my method so the first thing I do is use the retriever to pull out the film leader from the 35mm cannister. The reason why I do this is that I like to start my film on the reel in daylight so I can see what is going on.
Alternative Method - As I stated earlier, not everyone uses this method. The more traditional way is to start the film onto the reel in the dark.

There are different types of retrievers so I won't go into details on how to use them here but you should follow the instructions that came with your retriever.

To make it easier to load the film onto the reel, cut off the narrow part of the leader.
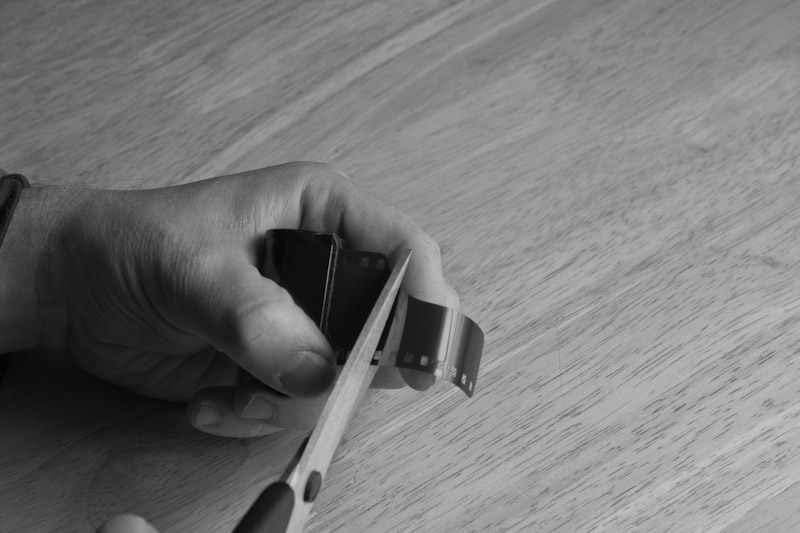
I also cut two slight diagonals into the film at the end to make it even easier to load. Once that is done you are ready to start the film onto the plastic reel.

Warning: At this point we are only starting the film onto the reel. Do not allow more than a few inches of film to come out of the cannister or you will fog the first shot or two.
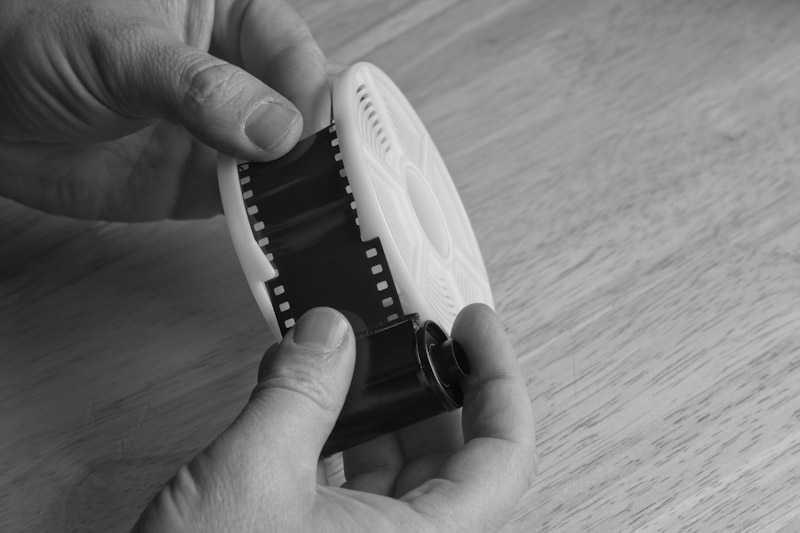
Insert the film into the spiral on the reel and make sure it catches in the ball bearings that are on either side of the reel.
Alternative Method - If you are not starting the film in daylight, you will need to do all of the above in the dark changing bag. In that case you will extract the film from the cannister by first opening the cannister. A bottle opener can be used for that. You will then trim the end of the film leader in the dark bag using a scissors and then start the film on the reel as I have shown above.
Once that is done you can put the reel with the film attached into the changing bag.

Next you will put the rest of the equipment you need into the changing bag. That means you need to put in the tank and the rest of its parts. So there is less clutter I assemble the tank first.

You can also put a scissors into the tank if you plan to cut the film off the 35mm spool later.
Next zip up the bag.
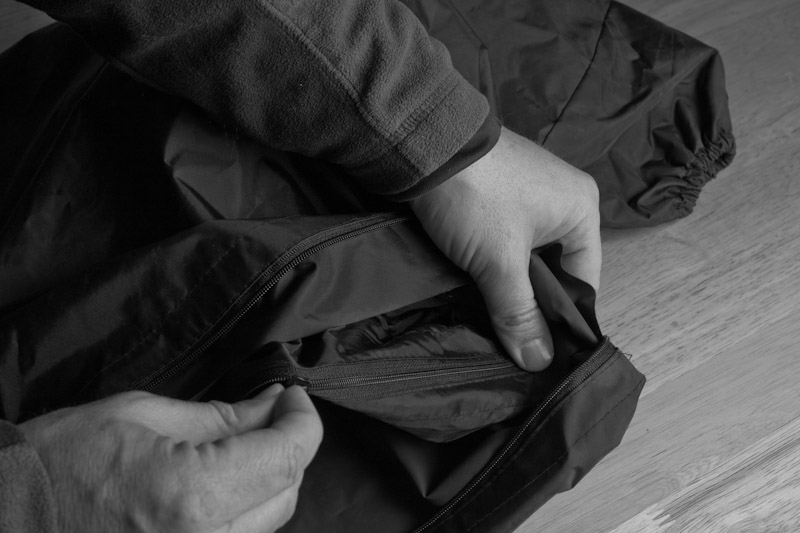
Most bags are double lined so there will be at least two zips. The inside of the bag is now lightproof.
Stick your arms into the "sleeves" of the bag and you are now ready to load the film onto the reel.

Working In The Dark
Warning: The next few steps take place inside the bag in complete darkness. Obviously, that wouldn't make for interesting photographs so for the next few photos I am using a black background to signify that this is inside the bag.
First of all, I pull some of the film out of the cannister. I don't pull it all out since inside the bag it is tidier if remains in the cannister until it goes on the reel.

To load the "Auto-load" reel, you ratchet one side back and forth and the film will automatically wind onto the reel. I recommend going slow at first to make sure it is loading properly. Remember all of this is now in the dark so you are going by touch.

Pull out more film from the cannister and load onto the reel and continue until all of the film is out of the cannister. At this point you will need to disconnect the film from the 35mm spool. You can either use a scissors (assuming you have one in the bag) or you can just pull the film off the spool with a little force. I usually do the latter.
After the film is detached from the spool, ratchet a little more to get the end of the film onto the reel.

Now you need to thread the center tube into the center of the reel. It doesn't matter which way up the reel is but make sure to push the tube all the way until it stops.

Now put the reel and tube into the tank. You must make sure that the reel is at the bottom of the tank so that when you later pour in chemicals, it is completely immersed.

Screw on the top of the tank. It should make a click when it is on all the way.

You can now remove the tank from the bag and bring it into daylight for processing.

If you are not going to process right away I'd recommend putting the lid on the tank since it is possible some light may get in over time.
And that's how I load a roll of film onto a reel. In this example, I used a 35mm roll but the process is similar with 120 medium format. The only difference is that you can't pre-load 120 film in daylight so everything is done inside the bag. But with a little practice it will become second nature.
Tips For Beginners.
Sacrifice a roll of film and practice everything in daylight until it is all second nature. You can reuse your sacrificial roll over and over until you get the loading down.
If things appear to be going wrong in the bag it is easy to start getting stressed and frustrated. If this happens, gather up the film in the bag and put it into the tank with the top on. Don't forget to also insert the center tube to keep everything light tight. Then take a break for a few minutes. When you come back to it, everything may just fit into place.
You may find it easier to load a 120 roll in a lightproof closet compared to a changing bag. My changing bag works for 120 but it is a little small.
Make sure you know how your equipment works. You may have a different tank than me so read the instructions before starting. Once again if you practice with it, everything will be easy once you start to load film blind.
I may have left something out so please let me know in the comments if something is not clear.
In part 2 I will talk about the chemicals we will use to develop black and white film.